DTF Transfers Arrived Damp or Creased? Check Before You Press
A parcel of ready-to-press DTF transfers arrives before a school-uniform or corporate T-shirt deadline. One corner is crushed, two designs look similar, and the press operator is waiting. The next decision should be a receiving check, before the transfers reach customer garments.
This guide is for finished, cured garment transfers bought from a supplier. It covers the handover from delivery to production. For dispatching decorated garments, use our separate DTF shipping guide. Raw ink, powder and unprinted film require their own storage instructions.
Chat with our team for printers, consumables, film, powder and business setup guidance.
1. Match the parcel to the job before opening production
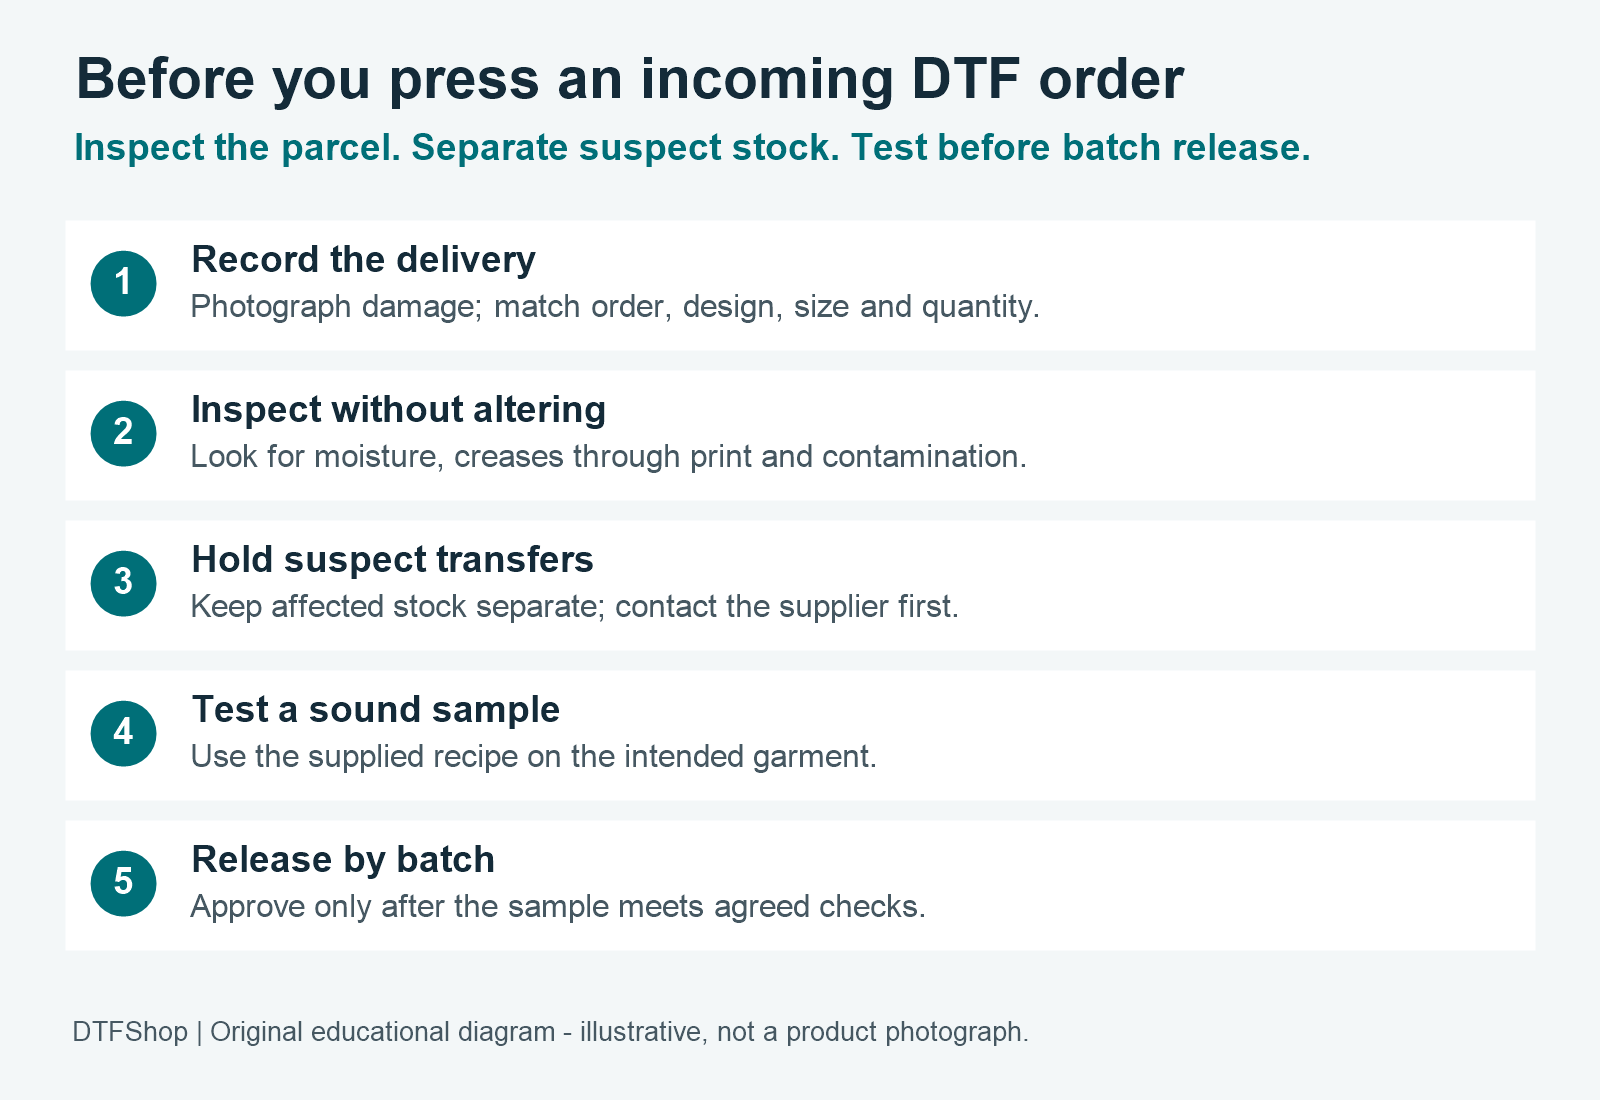
Create a receiving entry against the purchase reference, not just the courier number. Compare the supplied design names, printed dimensions and quantities with your approved artwork. Record who checked the order and when. A correct delivery address does not establish that the correct artwork version was supplied.
For repeat logos, keep a small approved reference image with the job card. Check dates, spellings, sponsor names and left-chest versus back-print sizes. A size label or artwork revision mismatch belongs on hold even when the print itself looks clean. Count each design separately before mixing sheets into a common drawer.
2. Preserve evidence and separate suspect stock
Photograph the parcel label, outer damage and affected sheets before cutting or altering them. Keep the supplier’s packaging and instructions with the order reference. This makes a support conversation specific: which item, how many pieces, and what condition was visible on arrival.
DTF Transfers Australia advises checking for moisture, creases and contamination, and testing questionable stock before production. Its guidance also cautions that desiccant cannot reliably repair moisture-damaged transfers. Follow your own supplier’s assessment for suspect material; do not assume apparent dryness proves recovery. Supplier storage and inspection guidance.
Use a clearly marked HOLD sleeve or container for the affected quantity. Keep it out of the operator’s released-stock area. Ask the supplier whether to return, replace or test it before attempting any treatment. Do not improvise reheating, extra powder or solvent cleaning on a finished transfer.
3. Use a simple hold, test or release decision
Hold: wrong artwork or size, missing instructions, visible water damage, contamination or a crease crossing the printed area. Record the affected quantity and contact the supplier. A deadline does not turn an unresolved defect into an acceptable transfer.
Test: the identity and condition appear acceptable, but the transfer batch or intended garment combination has not yet been validated in your shop. Use a spare transfer and a representative test garment.
Release: the order matches, the relevant sample checks meet your agreed criteria, and the operator has the correct application instructions. Release an identified quantity against a named job. Partial release is a recorded decision, not permission to mix questionable stock back into the batch.
4. Keep the supplier recipe with the sample
Record the transfer product, garment fibre composition, press identifier and supplier-specified time, temperature, pressure and peel method. Those values are product-specific. Transfer Express publishes different application instructions for its transfer ranges; a setting copied from another product is not a reliable substitute. Transfer Express application instructions.
Check the sample against the job requirement: placement, readable fine text, edge adhesion, appearance and feel. Save an unedited photo and the operator’s result. Where durability is part of acceptance, agree and record a wash-test procedure before promising the batch is ready. A visual pass straight off the press is not a completed wash test.
If the sample fails, stop the production release. Keep the failed test and its settings available for diagnosis. Changing several settings together makes it harder to tell whether the transfer, garment or application caused the problem. For colour complaints, use the separate DTF colour proofing checklist.
5. Make the batch record usable on a busy bench
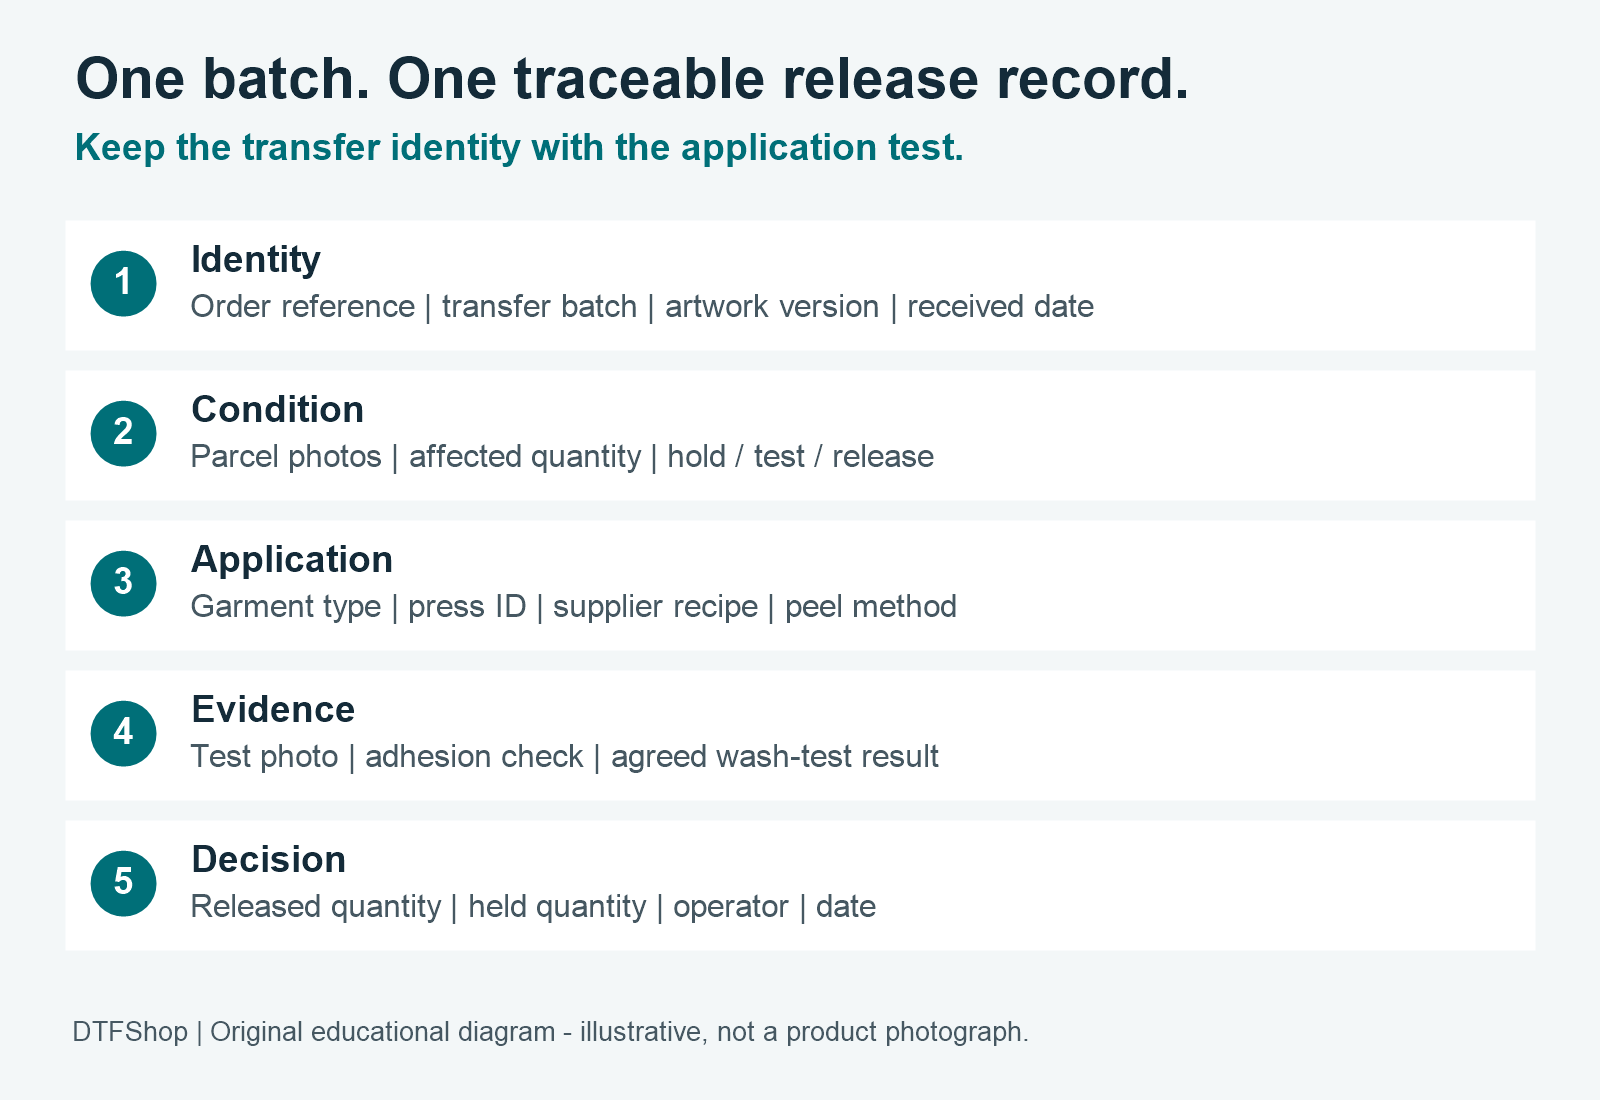
A spreadsheet row, printed card or stock label can work. The useful test is whether another operator can identify the approved transfers without asking the person who received them. Include the purchase reference, supplier batch if available, artwork version, arrival date, received quantity, held quantity, test result and released quantity.
Illustrative example: an order contains 100 chest logos. Four have a crease through the design. Record 100 received and four held; do not write ‘100 ready’. If one sound logo is used for an approved sample, record that use separately. There are then 95 visually sound pieces available for a documented batch-release decision, four held pieces and one consumed sample. This arithmetic is an example, not a measured rejection rate.
For a shortage against the customer’s order, confirm replacement stock or a revised production plan. Do not quietly cover the shortfall with a different transfer batch whose recipe has not been checked.
6. Protect the remaining stock after release
Transfer Express recommends cool, dry storage and keeping its UltraColor transfers in sealed packaging with the supplied gel pack. Its shipping workflow also keeps packing information and application directions with transfers. These are useful references; obtain the storage life and application requirements for the product you actually bought. Storage guidance; shipping and preparation guidance.
In a shop that moves parcels between an air-conditioned office and a warm production area, make receiving and protected storage an assigned task. Do not let a released quantity lose its identity when it moves to another bench. Return unused pieces to the labelled batch rather than a mixed pile beside the press.
Questions print shops ask
Can I press transfers that arrived damp? Hold them and ask the supplier for a decision before using customer garments. Do not treat extra heat as a universal repair.
Does one passing sample guarantee every transfer? No. It supports your documented release decision but cannot rule out damage elsewhere. Continue visual checks as pieces are used.
What if no spare transfer was supplied? Ask for a test piece or agree the cost of a sample before committing the job. Include sample allowance in future purchase planning.
Does every DTF transfer use the same peel? No. Keep the instructions for the exact transfer product and finish with the batch.
Build the check into your next order
Ask for identifiable artwork versions, a sample allowance and current application instructions when ordering. If you produce transfers in-house, keep the same receiving discipline for materials and a separate finished-transfer release record. Browse DTFShop consumables or contact DTFShop with your material and workflow details before choosing compatible supplies.
Sources and scope
Sources checked 19 November 2026: Transfer Express shipping and preparation article (page displays 21 May 2025 and 19 February 2026); Transfer Express storage and application pages (publication dates not displayed); DTF Transfers Australia storage guidance (page displays 7 October 2023 and 5 October 2026). Links appear beside the relevant guidance. Product-specific supplier instructions take precedence.
The receiving ledger, hold/test/release stages and quantity example are proposed shop procedures, not a certification or a published field trial. This article makes no claim about Indian search volume, failure rates, guaranteed shelf life or courier performance.