
Why DTF Powder Isn’t Melting Evenly: Oven Temperature Guide
Introduction to DTF Powder Melting Problems
Have you ever taken a DTF print out of the curing oven and noticed that some areas look smooth while others still feel grainy?
This is a common problem in DTF printing, especially when working with bulk t-shirt orders or a basic curing oven.
Chat with our team for printers, consumables, film, powder and business setup guidance.
DTF Powder Not Melting Evenly can lead to weak adhesion, rough prints, poor wash durability, and wasted PET film.
Many printing businesses immediately increase the oven temperature when this happens. But temperature is not always the only problem.
Sometimes the issue comes from uneven powder application, incorrect curing time, moisture, or cold spots inside the oven.
The good news is that most of these problems can be fixed with a few practical checks.
In this guide, we will explain how DTF powder melts, what temperature to use, and how to get consistent results without damaging your prints.
Why DTF Powder Isn’t Melting Evenly
DTF powder is a hot melt adhesive. It creates the bond between printed ink and fabric when the transfer is heat pressed.
For a good transfer, the powder must melt evenly across the printed design.
If one section melts properly while another stays dry, the final print may not stick evenly.
For example, imagine printing 100 cotton t-shirts for a school event. The center of the design looks perfect, but the corners start lifting after washing.
This may happen because the adhesive powder did not cure properly around the edges.
Common reasons include low heat, short curing time, uneven powder coating, and poor oven heat distribution.
When you notice DTF powder not melting evenly, check the entire curing process instead of changing the temperature immediately.
How DTF Powder Curing Works in an Oven
After printing the design onto PET film, hot melt adhesive powder is applied to the wet ink.
Extra powder is removed before the film enters the curing oven.
Inside the oven, heat softens and melts the adhesive particles. They join together and form a more continuous coating over the printed areas.
A properly cured design usually has a consistent, slightly glossy or fused appearance, depending on the powder.
Three curing conditions matter most:
- Oven temperature
- Heating time
- Even heat distribution
Using good-quality 🔵 Hot Melt Adhesive Powder and compatible 🔵 DTF PET Film also helps achieve consistent results.
Remember that curing the adhesive and heat pressing the transfer onto the fabric are two different steps. Each needs its own settings.
Ideal Oven Temperature for DTF Powder
One of the most common questions from DTF shop owners is, “What temperature should I set for powder curing?”
There is no single temperature that works for every powder.
The correct setting depends on the powder formulation, PET film, oven design, and heating method.
Here are general starting ranges for equipment setup and testing.
| Powder type | Approximate starting oven setting |
|---|---|
| Standard DTF hot melt powder | 110–130°C |
| Low-temperature DTF powder | 90–110°C |
| Speciality adhesive powder | Follow supplier instructions. |
These are starting ranges, not guaranteed curing temperatures. Some powder and oven combinations require different settings.
Always follow the powder manufacturer’s recommended temperature and time first.
For example, a small shop using a 🔵 DTF Curing Oven might begin testing standard powder at 120°C.
If the powder remains grainy, the operator should verify the actual heating conditions before making small adjustments.
Avoid increasing the temperature sharply. Excess heat can damage the PET film or adhesive.
Common Signs of Uneven DTF Powder Melting
You can often identify curing problems simply by inspecting the film.
Watch for these signs:
- Grainy texture: Powder particles have not fully fused.
- Patchy shine: Some sections appear melted while others remain dull.
- Loose powder: Unbonded particles fall away after cooling.
- Weak edges: The design corners lift during application or washing.
- Sticky surface: Excessive heating or an incompatible powder may be responsible.
- Poor wash results: Parts of the design lose adhesion after washing.
A well-cured print should look reasonably consistent across the entire adhesive area.
If the center looks glossy but the edges remain dull, the oven may have uneven heat distribution.
Main Causes of Uneven DTF Powder Melting
When dealing with DTF powder not melting evenly, it helps to separate the possible causes.
Low oven temperature: The adhesive particles receive insufficient heat to fuse properly.
Incorrect curing time: Even a suitable temperature will not work if the film leaves the oven too early.
Uneven powder application: Thick powder areas require different heating conditions from thin areas.
Excess powder: Heavy deposits may form clumps and leave a rough adhesive layer.
Moisture: Powder exposed to humid conditions can clump and behave inconsistently during curing.
Poor-quality or incompatible powder: Different powder formulations have different melting behaviour.
Hot and cold spots: Uneven heating causes one section of the film to cure faster than another.
In Indian print shops, humidity during the monsoon season can make powder storage particularly important.
Keep powder sealed in a dry environment and follow its storage instructions.
How Oven Temperature Affects DTF Powder Melting
Temperature directly affects how the adhesive behaves.

Under-melted powder
The powder remains grainy, dull, or loosely attached. Adhesion may be weak because the particles have not fused sufficiently.

Properly melted powder
The adhesive looks uniform and fused. It is ready for the next stage when the manufacturer’s curing conditions are satisfied.

Over-melted or burnt powder
Excessive heat may cause excessive flow, stickiness, discoloration, or damaged film. Burnt adhesive may lose its intended bonding performance.
The goal is not to use the highest possible temperature. The goal is to supply enough controlled heat for even curing.
How Curing Time and Conveyor Speed Affect DTF Powder
Temperature and time work together.
A print exposed to moderate heat for the correct duration may cure better than a print exposed to excessive heat for a short period.
For conveyor ovens, belt speed determines how long the film stays inside the heated section.
A faster belt means less curing time. A slower belt means more curing time.
For example, if a hoodie transfer comes out with unmelted powder, slowing the conveyor slightly may help, provided the temperature is already correct.
Always check the oven’s heated-zone length and recommended operating settings.
Make one adjustment at a time so you can identify what actually improves the result.
How to Identify Hot Spots and Cold Spots in a DTF Oven
Many operators trust the number shown on the oven display.
However, the displayed temperature may not match the temperature experienced by the film.
The sensor may be located near a heating element, while the print sits farther away.
An infrared thermometer can help compare accessible surface temperatures at different positions.
Check the left, center, and right sections using the same type of surface and measurement distance.
Remember that infrared thermometers measure surface temperature, not air temperature. Shiny surfaces can also produce misleading readings.
For accurate air-temperature verification, use a suitable calibrated temperature probe designed for the oven.
Never place your hand inside a heated oven or touch exposed heating elements. Follow the manufacturer’s measurement procedure.
How to Fix DTF Powder That Is Not Melting Evenly
If you notice DTF powder not melting evenly, follow this simple troubleshooting approach.
First, allow the oven to preheat. A starting routine of 5–10 minutes is useful for some small ovens, but larger machines may need longer.
Second, check the powder layer. Remove excess loose powder before curing.
Third, confirm that the oven is operating within the powder supplier’s recommended range.
Fourth, inspect the film arrangement. Avoid placing prints too close together or blocking the oven’s heat flow.
Fifth, test a small print before processing the full batch.
If the powder is still grainy, adjust one setting slightly within the approved range and repeat the test.
Do not increase temperature and curing time together. Otherwise, you will not know which change fixed the problem.
Best Oven Temperature Settings for Different DTF Powders
Different adhesive powders behave differently under heat.
Standard DTF powder is commonly tested around 110–130°C in compatible ovens.
Low-temperature powder may be designed for curing at approximately 90–110°C, depending on the formulation.
Specialty powders may have completely different requirements.
Always confirm the supplier’s specifications before production.
For example, if you switch powder brands during a seasonal rush order, do not automatically reuse the previous curing settings.
Even powders that look similar may require different temperatures or exposure times.
Keep a small notebook with successful settings for each powder, film, and oven combination.
How to Test DTF Powder Curing Before Bulk Production
Before curing 200 transfers, test one small design.
Print the sample using the same ink, film, and powder planned for the bulk order.
Cure it using the manufacturer’s recommended settings.
Once the film has cooled sufficiently, inspect its appearance and gently check for loose powder.
A properly fused adhesive layer should not have obvious dry granules falling away from the printed areas.
Next, apply the transfer to a test garment using the correct heat press settings.
Check edge adhesion after peeling according to the film instructions. Let the print settle and perform a wash test following the supplier’s recommendations.
Appearance alone cannot guarantee wash durability.
This small test can save a print shop from wasting an entire batch of t-shirts.
Common DTF Powder Curing Mistakes to Avoid
Several small mistakes can create repeated curing problems.
One is placing the film into an oven before it reaches a stable operating temperature.
Another is applying too much powder and assuming additional adhesive will produce a stronger transfer.
A thick, uneven powder layer can actually create a rough finish.
Overcrowding the oven is another common issue. Prints placed too close together may receive uneven heat, especially in equipment with restricted airflow.
Also avoid using a temperature setting copied from another machine without testing.
Two curing ovens displaying 120°C may deliver different heating conditions.
How to Prevent Uneven DTF Powder Melting in Future
Preventing DTF Powder Not Melting Evenly is easier than repeatedly fixing failed prints.
Develop a daily routine before starting production.
Check that the oven is clean and operating normally. Confirm the powder is dry and free from clumps.
Allow the oven to preheat according to its instructions.
Run a small test print and inspect the result before beginning bulk production.
During busy periods, such as Diwali merchandise orders or school uniform printing, avoid skipping these checks.
A few minutes spent testing can prevent hours of reprinting.
Best Products and Accessories for Even DTF Powder Curing
Good curing depends on correct settings, but suitable equipment also makes daily production easier.
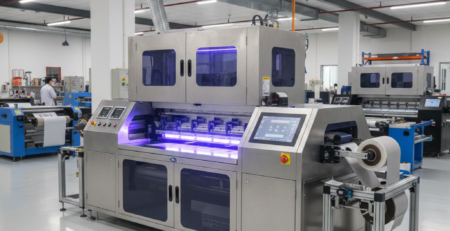
A 🔵 DTF Curing Oven provides a controlled heating area for curing powdered transfers.
Consistent 🔵 Hot Melt Adhesive Powder helps reduce variation between batches.
Quality 🔵 DTF PET Film is important because the film must remain stable during the recommended curing process.
For larger production volumes, a 🔵 Powder Shaker Machine can help apply and remove powder more consistently.
An 🔵 Infrared Thermometer is useful for comparing surface temperatures, while a 🔵 Heat Press Machine is needed to test final transfer adhesion.
The best equipment is not necessarily the most expensive. It is equipment that matches your workload and can produce repeatable results.
Step-by-Step Troubleshooting Checklist for Uneven DTF Powder Melting
Use this checklist whenever a transfer comes out with inconsistent adhesive melting.
Daily DTF curing checklist
Confirm that the oven is fully preheated
Check the powder supplier’s curing temperature and time.
Inspect the powder for moisture or clumps.
Remove excess powder from the PET film.
Check that films are properly spaced.
Compare temperatures across the curing area safely.
Adjust only one curing setting at a time.
Cure one sample and inspect it after cooling.
Heat press the sample and check adhesion.
Record successful settings before bulk production.
Reset checklist Copy checklist
Conclusion: Get Smooth and Even DTF Powder Melting Every Time
DTF Powder Not Melting Evenly does not always mean your oven is faulty.
Often, the solution is as simple as checking the actual temperature, correcting the curing time, removing excess powder, or improving film placement.
For small DTF businesses, consistency matters more than speed.
Use the correct powder, follow the manufacturer’s recommended settings, and test one transfer before starting a large order.
A stable curing routine helps produce smoother transfers, stronger adhesion, and more reliable wash results.
External References + Credits
The following sources provide additional background on DTF printing, adhesive curing, and technical testing.
1. FESPA – Direct-to-Film Textile Printing — Explains PET film, adhesive powder application, curing, and garment transfer. Its example curing conditions also show why temperature recommendations vary between workflows.
FESPA
2. ResearchGate — A research discovery platform for finding technical publications about hot melt adhesives, polymers, and thermal behaviour. Individual studies should be evaluated separately.
3. DTFShop – DTF Powder Curing Guide — Covers curing methods, visual inspection, common mistakes, and storage.
Dtfshop

LEAVE A COMMENT