
DTF Print Edges Blurry or Jagged: How to Sharpen Them
1. Introduction to Blurry or Jagged Edges in DTF Printing
You have prepared a design, printed it on DTF film, and checked the colours. But something looks wrong. The letters appear fuzzy, the outlines look uneven, or small details have turned into rough, staircase-like edges.
These problems are frustrating, especially when you are printing school logos, company uniforms, name prints, or custom T-shirts for customers.
Chat with our team for printers, consumables, film, powder and business setup guidance.
The good news is that blurry and jagged edges do not always mean your printer is faulty. Sometimes the problem starts with the artwork. In other cases, incorrect RIP settings, clogged nozzles, excessive ink, poor film feeding, or printhead alignment can affect the final result.
If your DTF print edges are blurry or jagged, the best approach is to identify the cause before changing several settings at once.
This guide explains how to diagnose common edge-quality problems, sharpen your artwork, adjust your printing workflow, and maintain consistent results in a real production environment.
2. Why Are My DTF Print Edges Blurry or Jagged?
DTF print edges become blurry or jagged when the printer cannot reproduce the artwork cleanly on the film.
Start by looking closely at the printed design. Are the edges soft and fuzzy? Do diagonal lines look like steps? Are letters doubled or shifted? Each symptom points to a different possible cause.
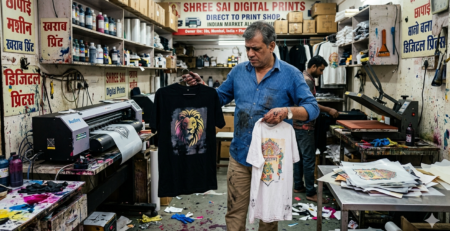
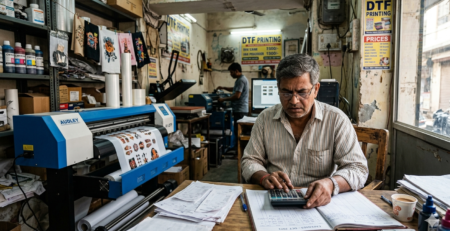
For example, imagine a print shop in India preparing 200 school T-shirts. The school logo contains small text and a thin circular outline. The printed logo looks rough even though the colours are correct.
If the original logo is a small image downloaded from a website, the file may not contain enough detail. Increasing the printer’s resolution will not recreate details that are missing from the original artwork.
On the other hand, if the artwork looks sharp on the computer but the print has doubled outlines, printhead alignment or bidirectional printing may be responsible.
Check these areas first:
- Artwork resolution and final print dimensions.
- RIP software settings and output resolution.
- Ink volume and white underbase settings.
- Nozzle condition and printhead alignment.
- Printhead height and film compatibility.
- Film feeding, static electricity, and environmental humidity.
Finding the cause first saves ink, film, time, and rejected garments.
3. Difference Between Blurry Edges, Jagged Edges, and Ghosting in DTF Prints
These problems can look similar from a distance, but they are different.
Blurry or fuzzy edges: The outline looks soft rather than clearly defined. Excessive ink, wet ink spreading, incorrect head height, or low-quality artwork may be responsible.
Jagged or staircase edges: Diagonal lines, curves, and small letters look like tiny steps. This commonly happens when artwork resolution is too low or a raster image has been enlarged too much.
Ghosting: A second, faint outline appears beside the main design. Incorrect printhead alignment, bidirectional timing, or film movement can cause this effect.
Banding: Horizontal stripes or gaps appear across the print. Missing nozzles, feed calibration problems, or inconsistent ink delivery may be involved.
Ink bleeding: Ink spreads beyond the intended boundary. Excessive ink, unsuitable media settings, incompatible film, or poor drying conditions can contribute to this problem.
A simple test helps. Print a design containing small text, straight lines, curves, and solid colour blocks. Inspect each section under good lighting. The pattern of the defect can help narrow down the cause.
4. Main Causes of Blurry DTF Print Edges
Too much ink
When the printer lays down more ink than the film can handle, wet areas may spread into nearby details. Small letters can fill in, and thin outlines may lose their definition.
Check the ink limit and media profile in your RIP software. Do not reduce ink blindly, because insufficient ink can also cause weak colors and poor coverage.
Incorrect printhead height
If the printhead sits too far from the film, droplets have more distance to travel before reaching the surface. Depending on the printer design and conditions, this can contribute to inaccurate placement or less consistent detail.
Follow the printer manufacturer’s recommended head gap. Make sure the film lies flat and does not curl into the printhead path.
Clogged or missing nozzles
A partially blocked nozzle can interrupt fine lines and make letter edges appear broken. Missing nozzles may also cause gaps, streaks, or uneven outlines.
Run a nozzle check before adjusting artwork or RIP settings.
Poor printhead alignment
If the printhead is not aligned correctly, adjacent passes may not meet cleanly. This can create soft edges, visible doubling, or uneven fine lines.
Use the printer’s prescribed alignment procedure and print a test pattern after making adjustments.
Film movement
If the DTF PET film slips, wrinkles, or feeds inconsistently, the design may shift during printing. Dust, static electricity, worn rollers, or incorrect feed settings can make the problem worse.
Check the film path, pinch rollers, take-up system, and static-control recommendations for your machine.
5. Main Causes of Jagged or Pixelated DTF Print Edges
Jagged edges often begin with the artwork rather than the printer.
A small image copied from a website may look acceptable on a phone screen but become rough when enlarged for a large chest print. The same problem can affect screenshots, compressed social media graphics, and low-quality logos.
Thin outlines and small text need particular attention. A logo that looks clear at 5 cm wide may not remain clean when enlarged to 25 cm.
Common causes include:
- Low-resolution raster artwork.
- Enlarging a small PNG or JPEG file.
- Heavy JPEG compression.
- Poorly traced vector artwork.
- Rough cut-out edges around transparent backgrounds.
- Very thin strokes or tiny text.
- Incorrect image scaling in design or RIP software.
Whenever possible, use clean vector artwork for logos, typography, and geometric shapes. Formats such as SVG, AI, or vector PDF can preserve smooth outlines when handled correctly by the design and print workflow.
For photographs and detailed raster artwork, prepare the file at its intended print dimensions and inspect it at 100% zoom before production.
6. How Low-Resolution Artwork Affects DTF Print Quality
Resolution determines how much image detail is available at the final print size.
For many DTF artwork files, 300 pixels per inch (PPI) at the final print dimensions is a useful preparation target. However, it is not a guarantee of perfect results. The original image must contain enough real detail, and the printer must be able to reproduce it.
Consider a small business logo that measures only 300 pixels wide. If you enlarge it to 10 inches, the effective resolution falls to 30 PPI. The edges will likely appear rough because the software must enlarge the existing pixels.
Upscaling software can sometimes improve the appearance, but it cannot reliably restore every missing detail.
For better results:
- Obtain the original logo or highest-quality available file.
- Use vector artwork for text, logos, and clean shapes where possible.
- Set the document to the final print dimensions.
- Aim for approximately 300 PPI for detailed raster artwork.
- Inspect small text, transparent edges, and thin outlines at actual size.
- Avoid repeatedly saving JPEG files, which can introduce compression artifacts.
For a school uniform order, request the school’s original logo rather than downloading a tiny version from its website. That one step may solve the problem before printing begins.
7. How RIP Software Settings Affect DTF Print Edges
RIP software converts your artwork into instructions the printer can reproduce. Incorrect settings can reduce edge quality even when the artwork itself is excellent.
Print resolution: Use a supported output mode suitable for fine details. Higher resolution may improve detail, but the result also depends on the printhead, pass strategy, and media profile.
Pass count: More passes can improve consistency or smoothness in some workflows, but they do not automatically sharpen every image. Follow the printer manufacturer’s recommended modes.
Ink limit: Excessive ink can cause bleeding, slow drying, and loss of detail. Use a suitable film-specific profile rather than changing the ink limit without testing.
Colour mode: Incorrect colour management can affect colour appearance and the relationship between colour layers and the white underbase. Use a profile designed for your printer, ink, and film combination.
White underbase: An oversized or misaligned white layer can produce a visible halo around the color design. Inspect the white layer and adjust its choke or expansion according to the RIP software’s documentation.
Feathering: This setting may help blend printing passes in supported workflows, but it is not a universal fix for fuzzy artwork. Use it only as recommended for your printer and media profile.
Choke: Choke slightly reduces the white underbase relative to the colored artwork to help prevent unwanted white borders. Too much choke can leave color edges unsupported, so use a test pattern.
Change one setting at a time. Print a small sample and compare it with the previous version before making another adjustment.
8. How Printhead Height, Alignment, and Nozzles Cause Blurry DTF Prints
The printhead must deliver ink consistently and accurately onto the film.
If the head gap is incorrect, the film is unstable, or nozzles are missing, even good artwork can look poor.
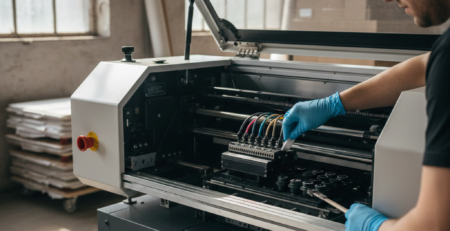
Start with a nozzle check. If the test pattern has missing lines, follow the printer manufacturer’s cleaning procedure. Avoid repeating powerful cleaning cycles unnecessarily, as they can consume ink and place extra strain on the maintenance system.
Next, inspect printhead alignment. If your printer supports bidirectional printing, compare a bidirectional test with a unidirectional test. Incorrect bidirectional timing can cause ghosting or doubled edges. Unidirectional printing may help diagnose the problem, although it can take longer and will not solve every source of blur.
Check the film path as well. A flat, stable film surface helps the printhead place droplets consistently. Never reach into the machine or touch the printhead while the equipment is operating.
If cleaning and alignment tests do not improve the result, consult a qualified technician before attempting mechanical adjustments.
9. How DTF Film, Ink and Humidity Affect Edge Sharpness
Not all films and inks behave in the same way.
The coating on DTF PET film affects how ink lands, spreads, and dries. An unsuitable or damaged film may produce inconsistent results. Use film and ink that are compatible with your printer and curing process.
Humidity can also affect production. In humid conditions, moisture may accumulate on film stored improperly, while wet ink can remain vulnerable to smearing or spreading. Very dry conditions may increase static electricity, which can interfere with film handling and attract dust.
For more consistent results:
- Store film in its recommended packaging and environment.
- Use compatible ink and film from a reliable supply chain.
- Keep the print area clean and free from dust.
- Follow the printer manufacturer’s recommended temperature and humidity range.
- Check film tension and roller movement.
- Allow ink to settle and dry according to the approved workflow before handling or curing.
For a detailed name-print order, inspect the first strip of printed film before running the entire batch. It is much easier to correct a feeding or ink-spreading problem early.
10. How to Sharpen Blurry or Jagged DTF Print Edges
If your DTF print edges are blurry or jagged, follow a simple process instead of changing every printer setting.
Step 1: Check the artwork. Open the original file and inspect it at 100% zoom. If the edges already look rough on screen, improve the artwork before printing.
Step 2: Confirm print size. Set the design to its final physical dimensions. Use a suitable raster resolution or vector artwork.
Step 3: Run a nozzle check. Look for missing or broken lines. Perform cleaning only when the test indicates it is needed.
Step 4: Check alignment. Print the manufacturer’s alignment pattern. Compare the results and adjust using the approved procedure.
Step 5: Review ink settings. Check the correct media profile and ink limit. If the ink is spreading, test a suitable lower ink setting within the manufacturer’s recommended range.
Step 6: Inspect the film. Make sure it is clean, dry, compatible, and feeding without wrinkles or slipping.
Step 7: Test print modes. Compare supported resolution and pass-count settings. If ghosting is present, test unidirectional printing as a diagnostic step.
Step 8: Print a small sample. Include fine text, curves, straight lines, and a white underbase. Compare the results under consistent lighting.
Step 9: Record the winning settings. Save the artwork version, RIP profile, ink settings, and print mode so the same result can be repeated.
This process helps you find the actual problem without wasting a full roll of film.
11. Best Printer and RIP Settings for Sharp DTF Prints
There is no single combination of settings that suits every DTF printer. An L1800-based system, an XP600-based printer, and an industrial i3200 setup may use different print modes, ink profiles, and maintenance procedures.
Use the following as a practical starting checklist, not a universal settings preset.
| Setting | Recommended approach |
|---|---|
| Artwork resolution | Aim for approximately 300 PPI at final size for raster graphics |
| Output resolution | Select a supported mode suited to fine detail |
| Pass count | Follow the printer and RIP manufacturer’s recommended profile |
| Ink limit | Use the approved film and ink profile; test before changing |
| White underbase | Check alignment and use appropriate choke settings |
| Bidirectional mode | Verify alignment; test unidirectional mode if ghosting occurs |
| Printhead height | Use the specified head gap and keep film flat |
| Nozzle condition | Run a nozzle check before production |
For thin lettering and small logos, print a test at the actual finished size. A large design preview can hide problems that become obvious on a 5 cm chest logo.
Avoid copying settings from another printer just because the model appears similar. Ink formulation, firmware, RIP software, and film can all affect the result.
12. How to Prepare Artwork for Sharp DTF Printing
Good artwork preparation prevents many edge problems before the printer starts.
For logos, text, and simple shapes, vector files are usually the best option. For photographs, use a high-quality raster file with sufficient detail at the intended print size.
Keep these tips in mind:
- Avoid using tiny screenshots as production artwork.
- Use approximately 300 PPI for detailed raster designs at final size.
- Check transparency around the design, especially on cut-out images.
- Inspect thin strokes and small text before exporting.
- Avoid excessive sharpening filters, which can create halos.
- Use clean vector paths instead of rough automatic tracing when possible.
- Export using a file format supported by your RIP software.
- Confirm that the artwork dimensions and proportions are correct.
For example, if a local business sends a low-quality logo through WhatsApp, ask for the original file before enlarging it for a uniform order. A clean vector logo will generally reproduce small lettering and curves more reliably.
13. Maintenance Tips to Keep DTF Print Edges Sharp
Regular maintenance protects print quality and helps prevent avoidable production delays.
Run nozzle checks regularly. Check the pattern before important orders and whenever print quality changes.
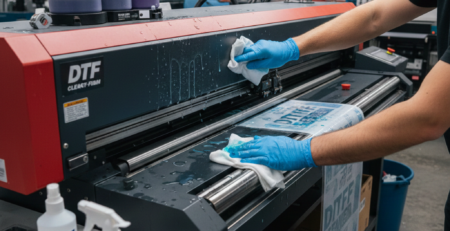
Clean the printer area carefully. Remove dust and loose film particles according to the equipment manufacturer’s instructions. Keep cleaning materials away from sensitive components unless approved for that purpose.
Use the correct cleaning solution. A compatible printhead cleaning solution may be appropriate for specific maintenance tasks, but it should never be used as a universal substitute for the manufacturer’s procedure.
Inspect rollers and film feeding. Look for contamination, slipping, uneven tension, or wrinkles.
Check the environment. Keep temperature and humidity within the printer and media suppliers’ recommended ranges.
Maintain ink systems correctly. Use compatible ink and follow the manufacturer’s storage, circulation, and maintenance requirements.
Keep a record of test prints. Save samples of good output. Comparing new prints with a known-good sample makes changes easier to detect.
Never scrape the printhead, force cleaning fluid into delicate components, or dismantle the machine without appropriate instructions and training.
14. Step-by-Step Troubleshooting Checklist for Blurry DTF Prints
Use this checklist when a print fails inspection.
- Inspect the original artwork at 100% zoom.
- Confirm that the design is prepared at its final print size.
- Check whether the defect is blur, jagged edges, ghosting, banding, or bleeding.
- Run a nozzle check.
- Perform the manufacturer’s approved cleaning procedure if required.
- Check printhead alignment and bidirectional timing.
- Confirm the correct film, ink, and RIP profile.
- Review ink limits and white underbase settings.
- Inspect printhead height, film flatness, rollers, and film movement.
- Check environmental conditions and possible static issues.
- Print a small test design.
- Change one setting at a time and record the results.
If the same defect remains after artwork, nozzle, and alignment checks, stop making random adjustments. Consult the printer or RIP supplier with a test print and the settings you used.
15. Product Suggestions

🔵 DTF Printer — XP600
A suitable printer setup, with correct alignment and maintenance, helps reproduce small text, fine outlines, and detailed artwork consistently.
DTF printer for sharp and detailed prints
Explore DTF printers at DTFshop.in

🔵 DTF PET Film
Compatible, properly stored film helps provide a consistent printing surface and supports reliable ink placement.
DTF PET film for consistent print quality

🔵 DTF Ink
Ink formulated for the printer and film combination helps maintain predictable ink behaviour. Incompatible ink can contribute to inconsistent output.
Compatible DTF ink for reliable printing

🔵 Printhead Cleaning Solution
A compatible cleaning solution may be used for approved maintenance procedures when nozzle checks indicate a problem.
Printhead cleaning supplies for DTF printer maintenance
Explore printer maintenance supplies

🔵 RIP Software
A suitable RIP workflow helps manage output resolution, ink limits, colour profiles, and white-underbase settings.
RIP software settings for sharper DTF prints
Explore DTF printing solutions
Internal linking tip: Place the printer link in Section 8, the film and ink links in Section 9, the RIP software link in Section 7, and the cleaning solution link in Section 13. This gives readers a relevant next step without interrupting the troubleshooting advice.
9. External References + Credits
1. FESPA — Colour Management in Digital Textile Printing: Read the FESPA article. It discusses how image resolution, sharpness, print technology, inks, and substrates contribute to print quality.
FESPA
2. Castle Ink — DTF Printing File Preparation: Read the resolution and file settings guide. It explains final print size, image resolution, and why enlarging low-resolution artwork can cause pixelation.
3. DTF Paper Company — Artwork Preparation for DTF: Read the artwork guide. It covers file formats, transparency, resolution, and preparing clean artwork edges.
DTF Paper Company
For technical accuracy, explain that 300 PPI at the final artwork size is a useful target, not an absolute rule for every design or printer. The printer’s output DPI is different from the source image’s PPI, and the recommended settings depend on the equipment, RIP software, ink, and film.

LEAVE A COMMENT