
UV DTF Stickers Peeling from Bottles? An Adhesion Checklist for Indian Gift Shops
Quick answer: If a UV DTF decal lifts from a stainless-steel bottle, tumbler or corporate-gifting blank, do not immediately replace the transfer film or change the printer. First identify where the failure occurred: on the film carrier, at the adhesive–bottle interface, at the edge of a tight curve, or after washing. A clean, compatible surface and complete pressure contact matter as much as the printed artwork.
This practical checklist is for Indian custom-gift stores, bottle decorators and small UV DTF operators preparing branded drinkware orders. The techniques are a starting point for controlled tests—not a guarantee that every coating, adhesive or bottle will pass.
Chat with our team for printers, consumables, film, powder and business setup guidance.
Why UV DTF labels peel even when the print looks good
UV DTF is a transfer process for compatible rigid surfaces. In a typical A+B workflow, the ink, white and varnish layers are formed on a release film, joined to an application film and transferred to the object with adhesive contact and pressure. It is not the same as apparel DTF, which uses hot-melt powder and a heat press.
Three different failures often get called “the sticker is peeling,” but they require different remedies. If the artwork stays on the backing or carrier before it reaches the bottle, check the film pair, lamination and pre-burnishing. If it initially transfers but an edge lifts immediately, investigate dust, oil, coating texture, tight curvature and incomplete pressure. If the transfer looks good on day one but lifts after use, examine care instructions, substrate changes and chemical or abrasion exposure before blaming the printing machine.
1. Check the actual bottle finish, not just the word “steel”
A bottle sold as stainless steel may have bare polished metal, glossy paint, smooth powder coating, coarse textured powder coating, clear lacquer or a specialty soft-touch finish. Adhesive contact differs across these surfaces. Two bottles of identical shape but different coatings should be treated as different test materials.
| Blank or finish | Practical assessment before accepting bulk work |
|---|---|
| Smooth bare stainless steel | Generally a useful trial surface; remove oils and fingerprints using a coating-safe method, then test the exact transfer. |
| Smooth painted or powder-coated metal | Test both cleaner compatibility and transfer adhesion on the actual finished blank. |
| Rough, grainy or textured powder coating | Higher risk of incomplete adhesive contact in tiny surface valleys; use a representative sample and avoid untested promises. |
| Smooth glass or glazed ceramic | Often a practical control sample, provided there are no protective films, residues or unsuitable treatments. |
| Rigid plastic, silicone or rubber grip | Plastic performance varies with resin and coating. Silicone and flexible rubber are generally poor candidates for standard UV DTF; confirm the transfer supplier’s approved surface list. |
Useful buying check: When choosing a UV DTF transfer film, confirm the film/adhesive system matches the application rather than relying on the words “premium” or “waterproof.” DTFShop lists UV DTF PET Film 24-inch A+B; verify its compatibility with your actual process and blanks before ordering.
2. Clean safely and let the surface become fully dry
Fingerprints, polishing oil, packaging residue, wax, cleaning additives and moisture can create a release layer between adhesive and bottle. Use a clean, lint-free cloth and a cleaning method approved by the blank manufacturer. Isopropyl alcohol is used on many suitable metal and glass surfaces, but it can damage certain painted, powder-coated, plastic or specialty finishes. Patch-test first; do not apply a universal alcohol concentration to every blank.
Do not touch the cleaned printing area with bare fingers. Allow all cleaner to evaporate before laying down adhesive film. Avoid wet application with water-and-soap spray unless your exact transfer-film supplier explicitly permits it; moisture under a pressure-sensitive adhesive can interfere with consistent contact.
3. Design for the bottle’s usable curve
A logo that sits comfortably on the middle of a cylindrical bottle may lift where the body becomes tapered or abruptly curved. Measure the available printable band on the actual blank, not from a catalogue silhouette. Avoid running narrow lettering, separate dots or sharp corners across a shoulder, seam or grip transition. For a tapered bottle, a smaller central logo may be more repeatable than one oversized wrap.
Before committing to a full gang sheet, create one correctly sized proof transfer. Place it on the bottle without touching the adhesive to confirm that the layout and orientation are suitable. Artwork direction must follow the particular A+B film system; do not copy apparel-transfer mirroring habits automatically.
4. Pre-burnish, place once and press from the centre outward
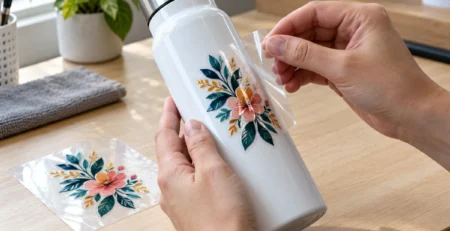
On the backing sheet, use a clean felt-edged squeegee to consolidate the layers as directed by your supplier. Peel the correct release liner slowly, holding the transfer by the edges. Align the first edge of the design, anchor it on the bottle and progressively smooth across the curved face to push out trapped air. Firm, even pressure matters most at isolated letters, thin strokes and pointed corners.
Do not assume the transfer can be repositioned safely once the adhesive touches the object. Repeated peeling and replacement can compromise the bond, stretch small elements and damage the coating.
5. Remove the carrier slowly; stop if a detail lifts
Follow the film maker’s specified peeling direction and angle. Many applications benefit from folding the carrier back close to the surface rather than pulling it upward. If a letter or edge comes away with the carrier, lay the film back down without shifting it and burnish that area again. If the same detail repeatedly refuses to release, stop the batch and check the transfer construction rather than forcing the entire sheet.
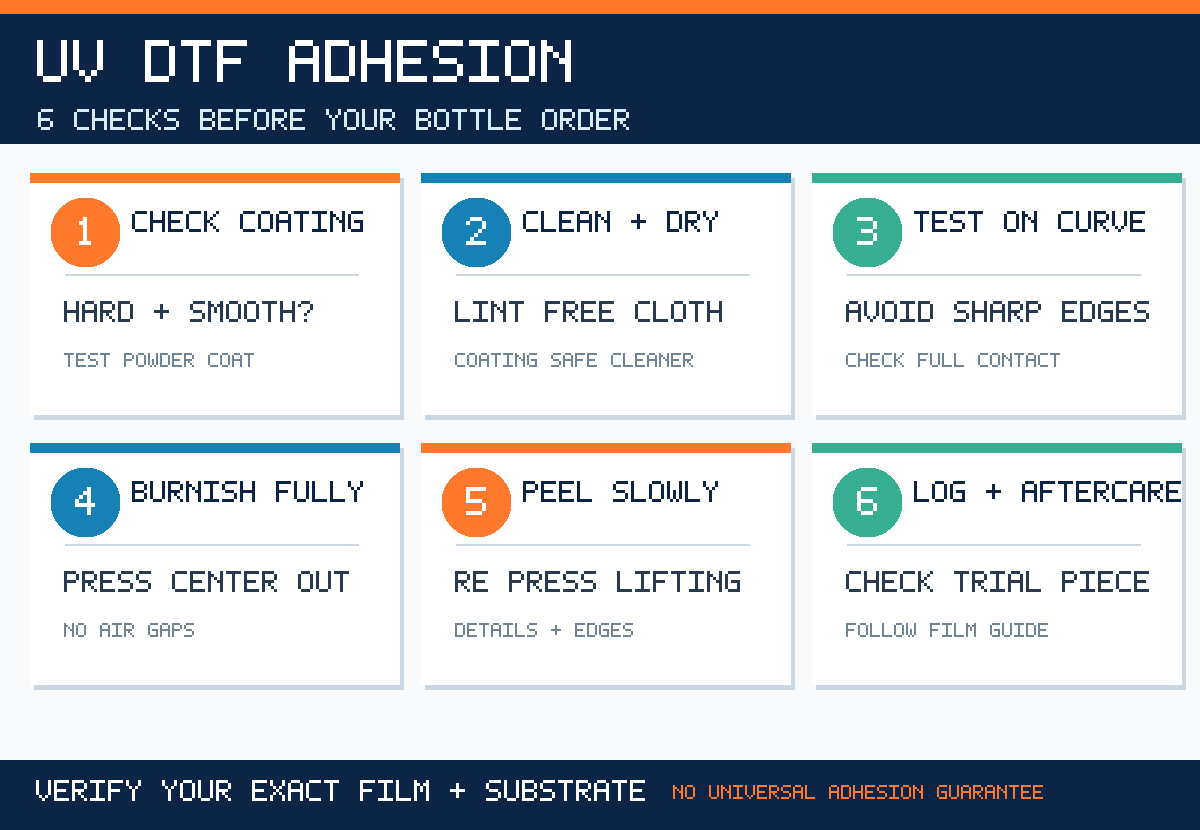
6. Qualify the result before shipping or promising durability
An attractive first impression is not a durability test. Allow any supplier-specified bonding or handling time, then assess each intended application against the customer’s normal use. For drinkware, check the finished object manufacturer’s cleaning instructions and the UV DTF supplier’s care guidance. Gentle hand washing with a soft cloth is a prudent default; do not promise dishwasher safety, long-term outdoor durability or chemical resistance without confirming them for the exact combination of film, substrate, design and use conditions.
Keep decoration away from mouth-contact, food-contact or other regulated-contact zones unless the materials and application have been independently cleared for that use.
Fast fault-finding: observe the symptom before changing consumables
| Visible symptom | First diagnostic checks | Next action |
|---|---|---|
| Logo remains on liner or clear carrier | Film orientation, A+B lamination, pre-burnishing, transfer-system compatibility | Trial a fresh small transfer on smooth glass as a control. |
| Only edge or small lettering lifts immediately | Contamination, tiny adhesive contact area, curve, incomplete pressure | Reduce fine details or move design to a flatter region; re-test. |
| Works on glass, fails on coated bottle | Coating chemistry, texture, cleaner residue, handling oil | Qualify that bottle finish separately; do not assume universal compatibility. |
| Bubbles appear under design | Moisture, surface texture, trapped air during placement | Dry thoroughly, apply progressively, inspect before peeling. |
| Peels after cleaning or customer use | Early washing, strong chemicals, abrasion, unsuitable base finish | Review care instructions and re-run a controlled use test. |
A practical 12-piece trial for an Indian corporate-gifting order
Suppose an office asks for 500 branded bottles in three finishes: smooth silver steel, glossy navy powder coat and textured matte black. Before ordering or printing 500 transfers, ask for representative samples of each exact finish. An illustrative trial might use four bottles per finish—twelve in total—with the same artwork, film batch and application technique. This is an example test design, not an industry-mandated sample size.
Record: blank supplier and lot, surface finish, cleaning method, transfer film/adhesive batch, artwork dimensions, operator, application date, visual result immediately after transfer, result after the film-maker’s waiting period, and the approved gentle-use/cleaning assessment. A pass on one finish must not be copied to the other two. If the textured matte bottle fails, propose a different blank finish or alternate marking method rather than accepting a high rejection risk.
The business cost of skipping this check is not merely the decal: rejected quantity × blank cost, plus the consumed transfer, handling, replacement and customer-service costs. Record your own costs; there is no universal cost-per-bottle figure.
Choose consumables for the transfer workflow
For shops producing their own decals, film, UV-curable inks, varnish, lamination and printer maintenance all influence transfer handling. The DTFShop UV DTF CMYKWV ink range and A+B film are product starting points, not a promise of suitability for every bottle coating. Match specifications, storage and process settings to your exact machine. For a broader application overview, see our existing guide to UV DTF printing for bottles.
Frequently asked questions
Can I use a heat press to fix UV DTF stickers on bottles?
Ordinary UV DTF transfers are pressure-applied rather than apparel heat-press transfers. Apply heat only if the manufacturer of the exact film system specifies it; indiscriminate heating can damage the bottle finish or transfer.
Why do UV DTF decals stick to glass but not to a powder-coated tumbler?
Glass and powder coating have different surface characteristics. Texture, coating chemistry or contamination can explain the difference. The glass is a useful control, not proof that the bottle is defective.
Should I use 70% or 99% IPA on every bottle?
No. The appropriate cleaning method depends on the coating, transfer supplier and safety instructions. Patch-test a manufacturer-approved cleaner and allow the surface to dry; never assume one solvent concentration suits every paint or plastic.
Can I reposition a crooked transfer?
Usually not reliably after adhesive contact. Use reference marks and a dry alignment check first; test an alternate application technique before a production order.
Is UV DTF dishwasher-safe or permanent?
Do not make either claim without product-specific evidence. Film chemistry, coating, application pressure and customer use all affect durability. Supplier instructions and a documented sample test are the appropriate basis for care advice.
What should I send a supplier if a batch fails?
Send the bottle finish and supplier, photos of the failure, film/ink batch, artwork size, cleaning approach, step where it failed and time since application. Separate a transfer-release problem from a later adhesion problem.
Need help choosing the right UV DTF film for your bottles?
Before buying film or accepting a corporate-gifting job, share the bottle material, coating type, artwork size, quantity and machine workflow with the DTFShop technical team. We can help identify compatibility questions and an appropriate sample-first plan. Contact DTFShop or review the UV DTF A+B film listing for product details.
Research and technical references
This guidance synthesises supplier application methods; it is not a laboratory adhesion specification, a measured Indian search trend or a product warranty. Sources were checked 20 November 2026:
- EVNIX, Why Do UV DTF Stickers Peel Off?, published 16 November 2026: adhesion diagnosis and surface compatibility.
- Raccoon Transfers, UV DTF Stickers for Water Bottles, published 2 July 2026: preparation and application.
- Profit DTF, UV DTF Transfer Care Guide, publication date not displayed (checked 20 November 2026): cleaning and aftercare cautions.
- DTFShop.in, UV DTF PET Film 24-inch A+B product information, checked 20 November 2026.
Editorial note: Illustrations are conceptual. Follow your equipment, consumable and blank manufacturers’ instructions. Actual adhesion and life depend on tested material combinations.




LEAVE A COMMENT