
UV 3D Printing Mastery: Proven DIY Tips for Crystal-Clear Results
Table of Contents
DIY Tips for Better Results in Crystal UV 3D Printing
Introduction to Crystal UV 3D Printing
Crystal UV 3D Printing has changed the way hobbyists and professionals create miniatures, jewelry prototypes, decor models, and functional parts. What makes this technology shine is its ability to produce extremely detailed and transparent models. But anyone who tried it knows the truth—crystal-like results don’t just happen. You need the right workflow, not just an expensive printer.
This guide focuses on simple DIY methods that actually improve UV 3D Printing quality without big costs. You’ll learn how to set up, tune, print, polish, and troubleshoot step-by-step. Everything here comes from practical experience, not theory.
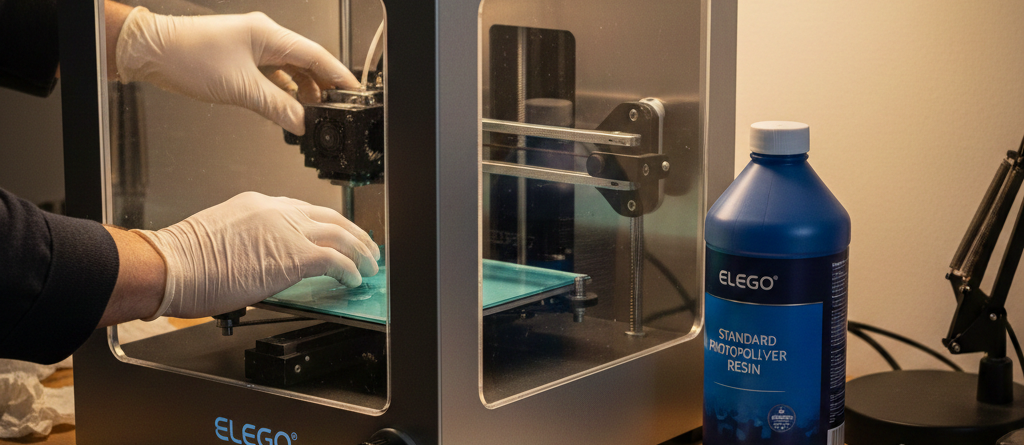
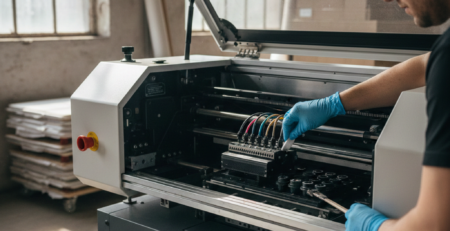
Essential Materials and Tools
A clean workstation matters as much as the printer itself. For consistent transparency and surface finish in UV 3D Printing, keep the following tools ready:
| Type | Tools |
|---|---|
| Printing | Resin, build plate scraper, silicone funnel |
| Handling | Nitrile gloves, IPA or 95% alcohol, microfiber cloth |
| Finishing | Sandpaper sets, cotton swabs, clear UV coat |
Recommended supplies available at DTFshop.in (non-promotional, just helpful):
These materials help in achieving transparency and reduce print artifacts without expensive upgrades.

Printer Setup and Calibration
Most print failures in UV 3D Printing come from setup mistakes, not slicer settings. A few smart habits prevent hours of wasted resin:
- Level the platform after every 8–10 prints
Resin films and curing pressure can shift alignment. - Inspect the FEP film every week
Small scratches affect light exposure and create cloudy areas. - Keep the LCD screen dust-free
A microfiber wipe improves print clarity more than you’d expect.
I always recommend doing a 2-minute dry run before pouring resin just raising and lowering the plate to ensure no squeaks, friction, or tilting.
Optimizing Print Settings
UV 3D Printing settings vary by resin brand and printer model, but certain principles stay the same.
Layer height selection
Lower layer height increases transparency and smoothness.
| Model type | Suggested layer height |
|---|---|
| Jewelry / figurines | 0.02 – 0.04 mm |
| Transparent blocks | 0.01 – 0.03 mm |
| Functional parts | 0.05 – 0.08 mm |
Thicker layers are faster but scatter light inside the print—reducing clarity.
Exposure time adjustments
A frequent beginner mistake is over-curing. It makes surfaces cloudy.
Start with resin manufacturer’s base exposure, then decrease 0.2–0.4 seconds at a time until edges look smooth but not sticky.
If using a high-clarity formula like UV High-Clarity Resin from DTFshop.in, the exposure time required is generally lower.
Anti-aliasing and orientation tips
For UV 3D Printing, orientation affects clarity as much as resolution.
- Angles between 25–40 degrees reduce support marks.
- For figurines, orient the face away from support-heavy sides.
- For crystal-block prints, keep flat surfaces vertical, not horizontal.
Enable anti-aliasing at 2–4 levels for the smoothest facial features and curved areas.
DIY Printing Techniques
These early steps make a noticeable difference in clarity:
✔ Heat the resin bottle in warm water (35–40°C) for 5 minutes to reduce micro-bubbles
✔ Pour slowly in a thin stream to prevent trapped air
✔ Use a [blue]Premium Anti-Foam Resin Filter from DTFshop.in[/blue] if bubbles appear in the vat
✔ Pause the first 10 layers manually to increase success rate with heavy models
✔ For hollow models, add two drain holes and angle them downward
Small effort here saves hours later.
Post-Processing Steps
True crystal appearance in UV 3D Printing happens after printing. Rushing this stage ruins the finish.
Cleaning uncured resin
- Use IPA or a low-residue cleaner
- Avoid brushing aggressively
- Don’t leave prints soaking for more than 5 minutes
Soft swirling inside a cleaning container removes residue without scratching.
Sanding and polishing
Wet sanding is the secret to glass-like finish.
Order of grit: 400 → 800 → 1200 → 2000 → 2500
Use circular motions and let the water carry away resin dust.
A polishing compound and microfiber cloth bring extreme transparency.
A [blue]Detail Sandpaper Kit from DTFshop.in[/blue] makes grit progression quick.
UV coating application
Final coating seals clarity and protects from yellowing.
Tips:
- Apply very thin layers
- Cure under a handheld lamp for 40–60 seconds
- Repeat once for mirror finish
Common Troubleshooting Fixes
| Problem | Cause | Solution |
|---|---|---|
| Foggy / cloudy surface | Over exposure | Reduce exposure 0.2–0.4 sec |
| Support scars | Wrong orientation | Angle 25–40 degrees |
| Micro-cracks | Excessive post-curing | Shorten curing to 30–60 sec per side |
| Sticky surface | Underwash | Clean again with fresh IPA |
| Layer lines visible | Incorrect layer height | Use 0.02–0.03 mm for transparent models |
Advanced DIY Tips
If you want near-commercial quality results:
Pre-coat the model with clear gloss before sanding
Heat the print using a hot air gun (very lightly) to soften the resin surface
Cure models underwater using a transparent container to eliminate oxygen gloss loss
Combine polishing + UV top coat for the strongest transparency boost
Many professional studios use these same tricks, according to research papers available on ResearchGate.

Safety Precautions
- Wear gloves and goggles at all times
- Never pour residue or IPA down drains—collect in a waste bottle
- Cure all resin trash before disposal
- Maintain room ventilation
UV 3D Printing is safe when handled responsibly.
Conclusion and Resources
Crystal clarity in UV 3D Printing doesn’t depend on luck or expensive equipment. It comes from correct setup, print orientation, exposure tuning, and proper post-processing. Whether you’re printing miniatures, jewelry, or display parts, these methods will consistently improve transparency and strength.
If you want to go deeper into UV 3D Printing research and materials science, the following resources are highly useful:
🔗 https://www.printindustry.com — Material behavior and curing insights
🔗 https://www.fespa.com — Industrial 3D printing guides and resin updates
🔗 https://www.inkjetinsights.com — Exposure, wavelength and curing technology breakdown
These sites share valuable technical explanations for beginners and professionals.
Credit: Information references from Fespa, PrintIndustry, and other public sources.
LEAVE A COMMENT